
Managing Training Groups
How to manage my training groups and training material associated with each course.
Log in to your website admin section and navigate to Dashboard > Training Module
Click the “Training Groups” option on the training dashboard.
Defining the Training Groups
Initially, you only going to add a “Course Name” to the group with no articles, files or exams allocated. In the meantime, your training officer will be using the “XMS Systems Article Module” to add training material. These training material/articles will later be added to the specific Training Groups.
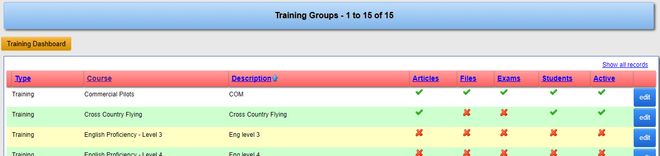
The list of courses or Training Groups will show you the Course Name, description, if articles, files and exams, students are allocated and if the specific course is active or not.
Click “add new” at the bottom to add a new training group.
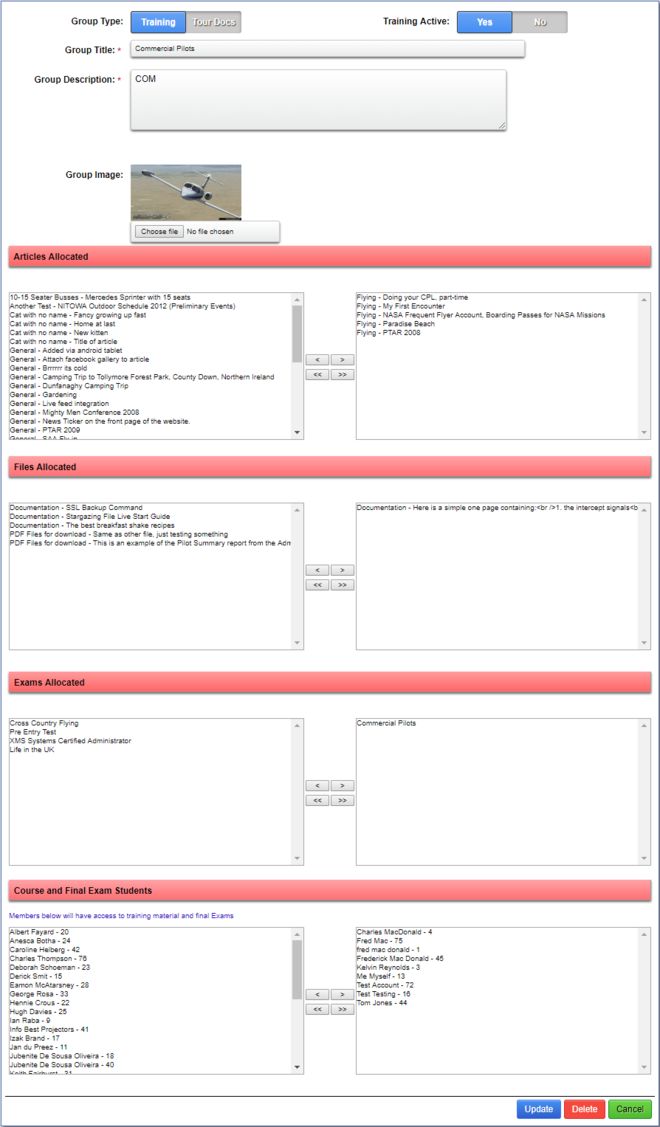
- Course Title
A descriptive title for your course. This will be used as the URL to the course as well as the title of the exam and URL to the exam - Course Description
Short but thorough description of your course. This will also be used in the page SEO as well as used when posting to social media - Course Image
This image will be displayed on the course and exam page. Will also be used when porting the social media. Suggested size would be 642x328 pixels - Articles Allocated
On the left is all the articles available on your website. Select the article/s and click the right arrow to “move” the article to the right column. This action will allocate the article to the course. - Files Allocated
On the left is all the files uploaded to your website. Select the file/s and click the right arrow to “move” the file to the right column. This action will allocate the file to the course. - Exams Allocated
On the left is all the exams defined in your exam module. Select the exam/s and click the right arrow to “move” the exam to the right column. This action will allocate the exam to the course. - Students Enrolled
On the left is a full list of your registered members. Select those you would like to do the course from the left and click the right arrow to “move” them over to the right. This action will enrol a member as part of the course.
Note:
- You do not need to allocate articles, files or students to allow for a practice exam
- You do not need to allocate articles or files to allow for a final exam