
Using the Remote Browser to upload and manage images in pages and articles

An integral part of managing your own website is the ability to upload and manage images to be used in your pages and articles.
For this process we integrated a "Remote File Explorer" into the editor that you use to create and edit your content.
Remote File Browser overview
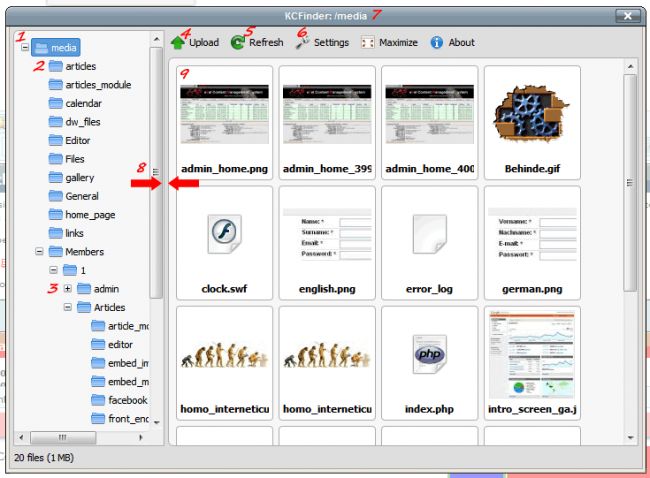
- Root Folder
- Sub folders
- Click the "+" to open a sub folder
- Click to upload to current folder
- Click to refresh current folder
- Click to switch between "Thumbnail View" and "List View"
- Current Folder
- Resize the width of the two panels
- Preview of content in current folder
Just like on your personal computer we use folders to store and organise the different content. Your computers "Root Folder" might be called "C-Drive" with "Sub Folders" inside it. On your website we call it "Media"
If you have more than one user on the computer each user would have their own set of folders to save their documents, that folder would be called "My Documents", on your website we call it "Members/X" where X is the members id number.
The "Members/X" folders would be created automatically as soon as they start submitting articles and upload images.
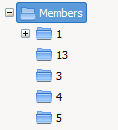
The complete file structure is only visible for Website Administrators and only if they are managing images from the Administration Section. Members and Administrators that are working from the "Member Section" will only see their own folders and files.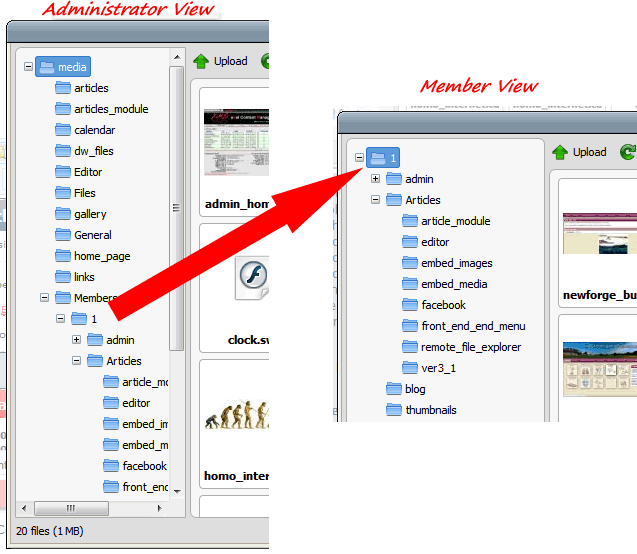
This allows the Administrator to re-use and manage images uploaded by Members while Members can't get access to the rest of the website images.
Using the "Remote File Explorer"
Accessing the Remote File Explorer
From within a page or article click the "Insert Image" button ![]()
Next click the "File Explorer Button" and you will be presented with the "Remote File Explorer"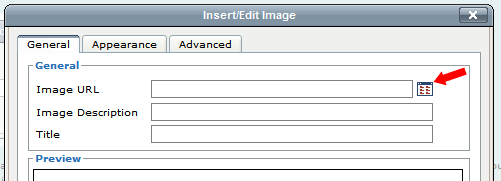
Creating and Managing Folders
Like on your home computer files and folders needs to be managed properly or things will become very messy very quickly. With the result you eventually don't know where to find what.
I would suggest to make separate folders for different pages and articles so that your file structure would look something like this.
Media
Pages
Home_Page
Contact_Us
Articles
First_Article
Second_Article
To manage your documents on your personal computer you would "Right Click" with your mouse and create a new folder. Our "Remote File Explorer" works the same way. To create a new folder "Right Click" on the "Parent Folder", the one you want to create a sub folder in. A window will pop-up with different options to select from.
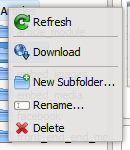
- Refresh would refresh the current folder
- Download would allow you to download the files and folder to your local pc
- New Sub folder would create a new folder for you
- Rename would rename a folder
- Delete will delete the folder and images inside it.
Note:
If you rename or delete a folder with images that are used somewhere in your website be sure to go and update the relevant pages. The system will not do that for you automatically. Be careful when deleting images there is no undo or restore function
Uploading Images
Click on the folder you want to upload to then simply click the "Upload" icon (number 4) and a window will open on your computer where you can select the images you want to upload. You can upload more than one image at a time by using the normal windows short cuts to select your images.
Once the images are uploaded you will see them in the preview page (number 9). If you do not see them, click the "Refresh" icon (number 5)
Changing the Preview
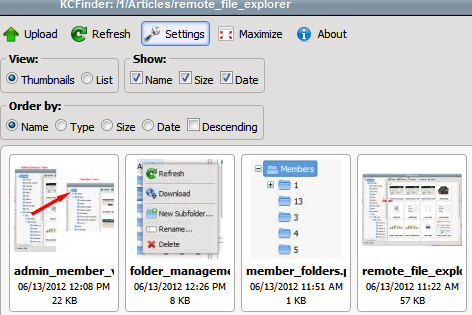
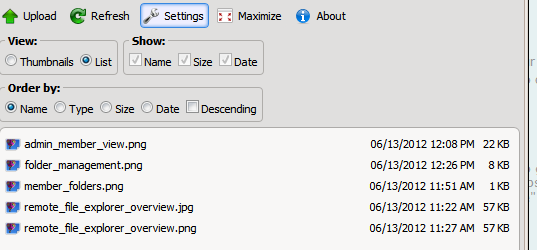
To view more information about an image or change the way the images are listed in the preview pane, click the "Settings" icon (number 6) and select the options you need.
Using and Managing Uploaded Images
Once an image has been uploaded you obviously need to have a way of selecting the image and use it in you text.
You cursor was hopefully at the point in your text where you want to insert the image before you opened the "Remote File Explorer". If not, close the explorer by clicking in the "X" on the top right hand corner, close all other windows and position your cursor where you want the image to appear in your text.
Open the Remote File Explorer again, find the image you want and "Double Click" your "left mouse button" to select the image. Proceed as you would normally insert an image as described in the "Using the XMS Systems WYSIWIG Editor"
Another way to insert an image is to "Right Click" the image with your mouse and select the options from the content sensitive menu.
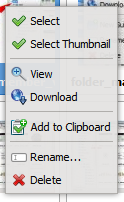
- Click "Select" to insert the image into your text
- Click "Select Thumbnail" to insert the small 100 x 100px thumbnail into your text
- Click "View" to view a large version of the image
- Click "Download to download the image to your computer
- "Add to Clipboard" will allow you to paste the image later
- "Rename" the image before you use it
- Delete the image
Note:
If you rename or delete and image that is used somewhere in your website be sure to go and update the relevant pages. The system will not do that for you automatically. Be careful when deleting images there is no undo or restore function
