
Step 6 - Configure Automation Settings and Cron Job
How to configure XMS Systems automation in your Administration Section as well as your hosting account.
Ste last and equally important step is to configure your website automation to take care of the following;
- Forex Update
This option will automatically update your exchange rates for the currencies used on your e-commerce and/tour manager - Abandoned Shopping Carts
This option will send an email to your e-commerce client if they abandoned a shopping cart. FB Album Sync
This option will automatically refresh your Facebook Albums- XMS Blocked IP Sync
This will retrieve a list of blocked confirmed bad IP addresses from a central database.
What we are trying to achieve.
What we are going to do is to configure your website to do any or all of the above things automatically. This will include some advanced configuration on your hosting account. It might be tricky however by carefully following the steps it should be easily achievable.
If you do run into any trouble, please open a support ticket via the usual channels.
Configuring your website automation
Log into Admin > Dashboard > Website Configuration > General Configuration.
To activate the automation you need to;
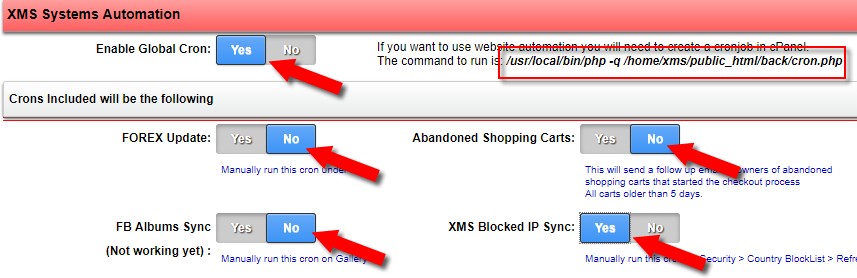
- Set “Enable Global Cron” to “Yes”
- Select any or all of the following 4 buttons to “Yes”. At the very least “XMS Blocked IP Sync”
- Copy the “Command to run”
Setting up a Cron Job on your Exelwebs hosting account.
- Log into your Exelwebs.com client area
- Click the Service option
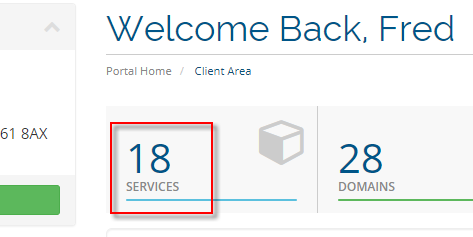
- Select your Hosting Account for the specific website and click the “Active” button

- Scroll down and click the “Cron Jobs” icon
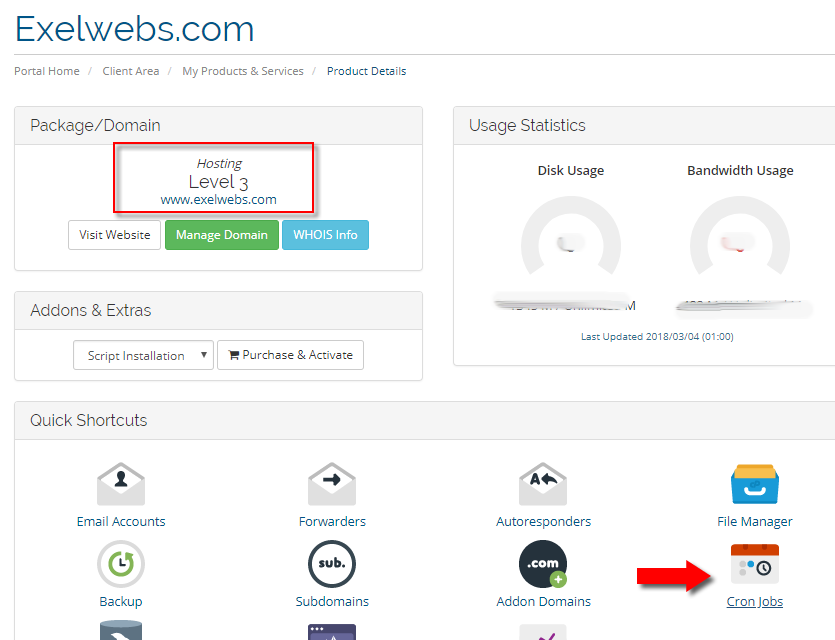
- You will now be redirected to the Cron Job section on your hosting account.
- make sure the correct email address is listed. Every time a cron job is run by the server you will get an email notification.

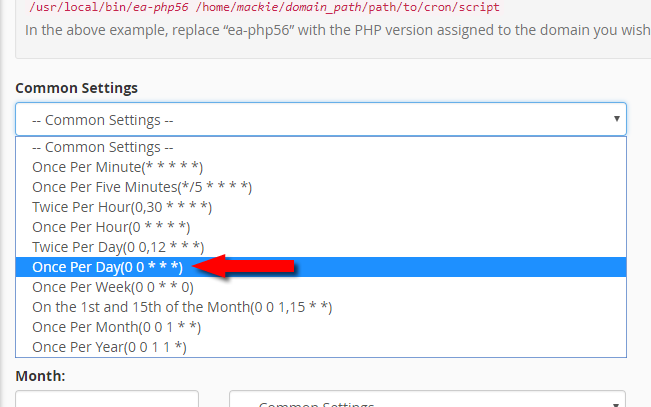
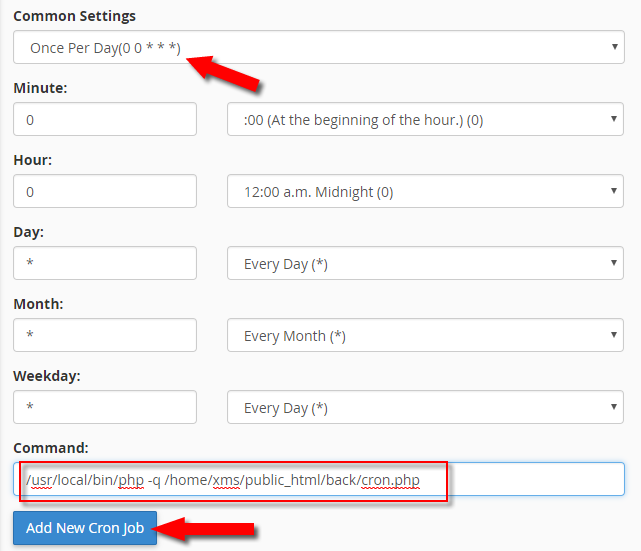
- From the “ Common Settings” drop-down, select the “ Once per day” option as indicated.
- At the bottom of the form, paste the “Command To Run” you copied above from your website and click the “ Add New Cron Job” button
- The server will now update some configuration files on the server and display your active cron jobs as below
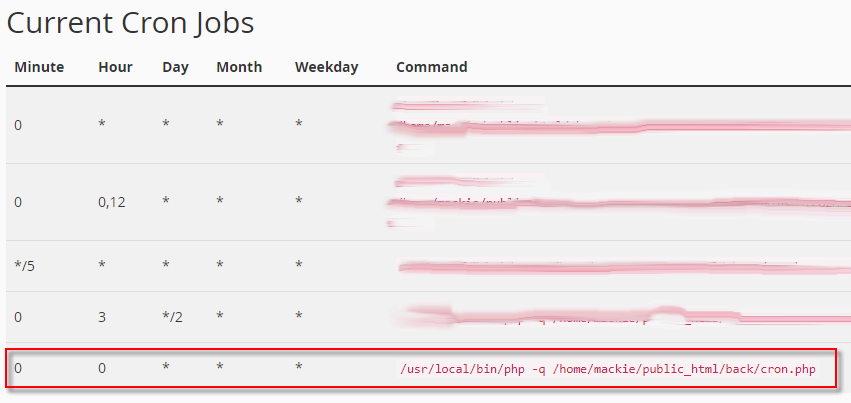
The newly added cron job will now run at midnight (GMT) every night until you change or delete the cron job from the server.
If midnight (GMT) does not suit your timezone, you can edit the cron job and change the “Hour” to the time that suits you and your site visitors.
How to update or change an active cron job?
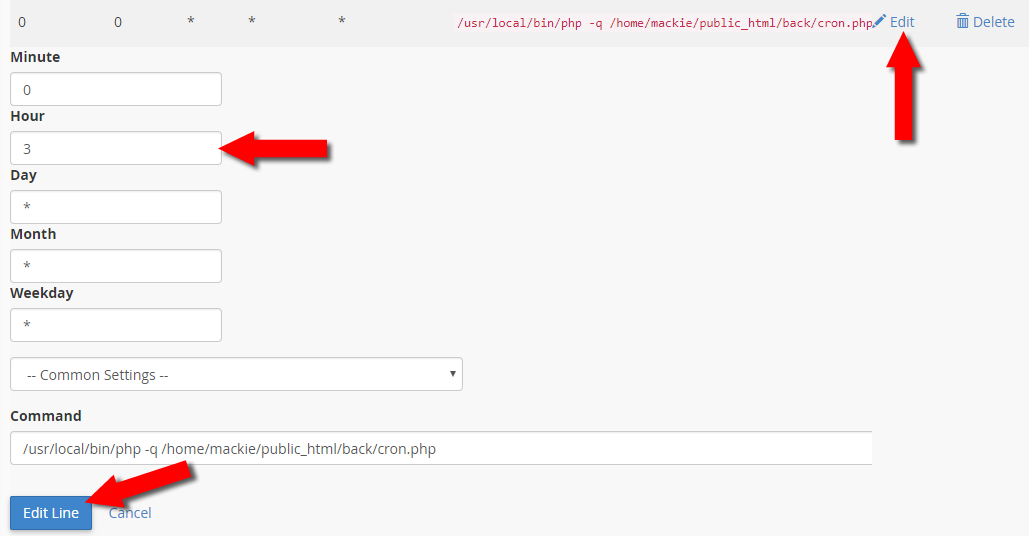
- Click “Edit” to “open” the con job details and option
- Change the values as needed., In our case, we changing the “Hour” value to “3”
- Click the “Edit Line” button.
Your cron job will now automatically run at 03h00 (GMT)
As usual, if you getting stuck drop us a support ticket via the usual routes.
If you landed on this page trying to figure out how to configure a cron job and you do not have hosting with ExelWebs.com, you can visit EasyCron.com to get you started. I have been told they are doing a great job in hosting cron jobs if your host does not support crons.