
Configuring the XMS Systems Testimonial Module
Follow this tutorial to configure your testimonial module for the first time.
Login to your website administration area and click “Site Dashboard” > “Website Configuration” > “Testimonial Defaults”
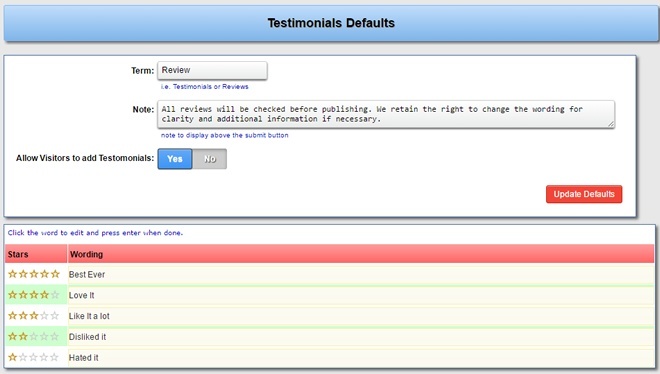
Configuring the basics
- Term
The word or phrase you want to use to describe what you want the visitor to do- “Review” is the term used for independent reviews of a product or service. Usually done on a website other than your own. However your users might not be inclined to register with a review website to post a review. So no stopping you from asking them to do it straight on your own website. Remember they come with the good and the bad reviews. No product ever had only positive reviews. So do not delete the negative reviews
- “Testimonial” would be used by a client telling the world, on your own website, how good you are. These usually are a selection of the “bestest” of clients and usually selected by the service provider. So you can, if you want to, delete the negative testimonials
- Note
This is just to explain to the poster what you going to do with his.her “review/testimonial/call it what you want” during the validation process - Allow Visitors to add…
Set this to “Yes” to allow anyone to add a review. Set this to “No” and you can only add entries via the Administration Section (Testimonials maybe...) - Click update to save your work
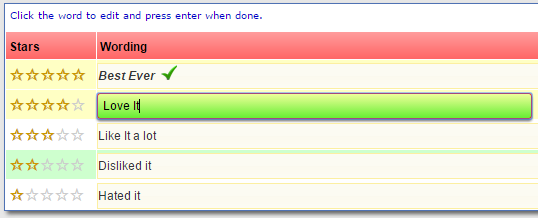
Changing the Wording describing the Stars
- Click anywhere on the word
- Edit the word and press enter on your keyboard
Do not make the word/sentence to long. Make sure you check the front-end on a mobile device to ensure it fits the viewport - A green checkmark will show if it was updated successfully
Changing the page layout and content
The layout of the “Testimonials” page can be edited under “Manage Site Content” > “XMS System Pages” > “Page Id 51”. The layout of the actual review and content are fixed in the application to ensure it works properly with the responsive layout.