
Adding Files for download

To add files to your website that visitors can download
Admin >> Dashboard >> Manage Site Content >> Downloadable Files
- You will see a list of file with the usual edit and add buttons
It is important to note that a file can be restricted to be available to registered users of different levels or everyone.
The file order can also be changed by clicking the up or down arrows and then clicking "save" at the top of the page to save the order.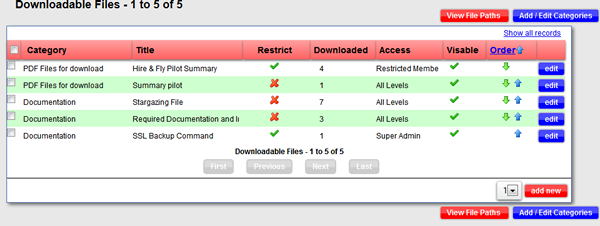
- Categorising your files
Before you can upload any files you need to create at least one category.
Click the Add/ Edit Categories" button.
The usual buttons will be available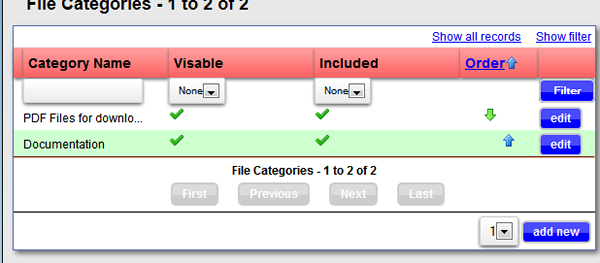
- Edit the category and set the appropriate options.
To hide a category and all the files it contains select visible as "No"
Included should be set to "No" (advanced functionality)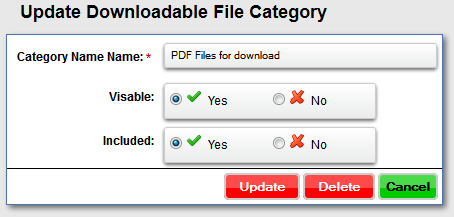
- Uploading the file
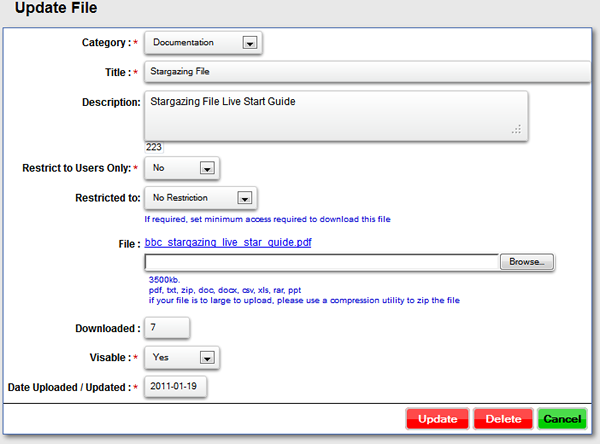
Navigate back to the first screen (step 1) and click "add new" or "edit"
- Select the Category
- Enter a Title / Short Description for the file
- Enter a long description for the file.
Note you are limited to 255 characters. - For unlimited access select "No" and leave as "No Restriction"
- For limited access select "Yes" and the access minimum level needed for the user to be able to download the file
- Click "Brows" to select the file on your pc that need to be downloaded
Take note of the file size and file name limitations. If you need a different file type please contact us so we can update the functionality.
No executable file in any shape of form will ever be allowed to be uploaded. - The next field displays the number of time the file has been downloaded. Normally this will be set to "0" and will increment automatically when a user clicks the download link.
- Select "Yes" for the file to be available
- "Date" is for reference to allow you to keep track of the "age" of the file.
- The download link on the page and the actual File Paths (location of the file on your server)
The download links will automatically created on the relevant pages. (See below). How ever in some cases you might want to link directly to one of the files. To be able to do this you will need to url of the file. (File Path)
Note: We strongly advice against this as it will expose the file url and other website will be able to hotlink to your file without your permission. USE WITH CARE!
Click the "View File Paths" (step 1)
You will see something like /files/uploads/the_name_of_the_file.extension (it is greyed out for security reasons)
Paste or type that url onto your content where you want to link directly to the file.
Note: You will usually not do this. If you want to use the standard file download module you can skip step 5.
On the website you have two options available for making the files available.
- List all the files by category
The file name you will link in your "Front End Menu for this option is "file_list.php" and will give this result: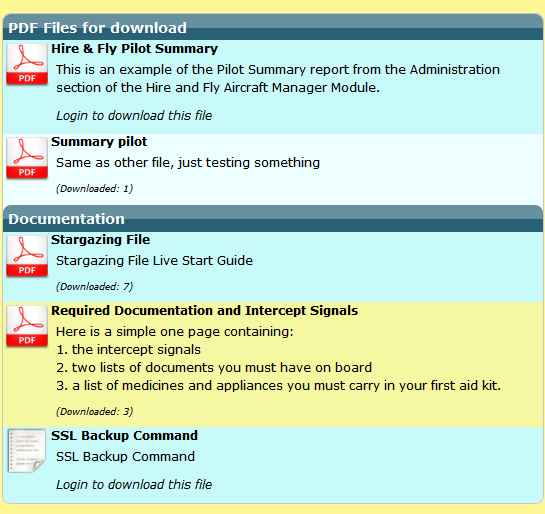
- List each category separately.
The file name you will link in your "Front End Menu for this option is "file_list_by_category.php" and will give this result: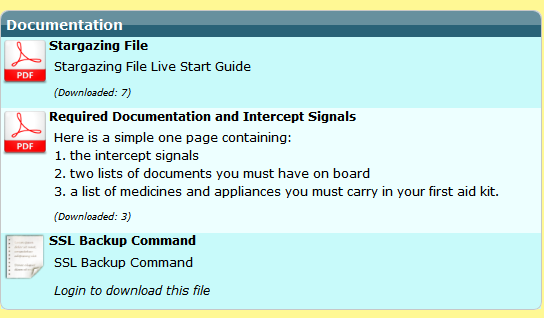
What if a file is larger than the allowed size?
See this article here...
