
Generating a new language file for XMS Systems
Procedure for generating a new translation and related language file.
Log in and navigate to Dashboard > Website Configuration > General Configuration.
.png)
Click “Translations”
You will see something like the image below.
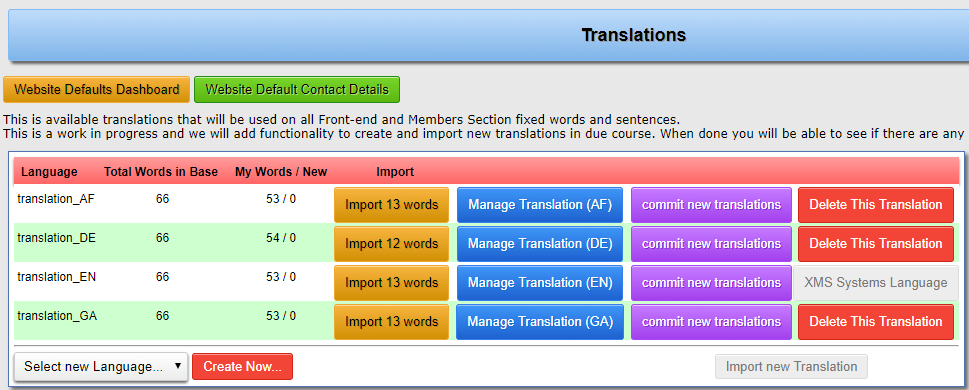
- Language
This would be the actual name of the file containing the translated words used on the website - Total Words in Base
This is the number of words in the central Base database. - My Words / New
The first column shows the number of words in the translated database. If there are any new words that needs translation the number would be in the second column - Import
A comparison is made between the “My Words” and “Total words in Base”. If there is a difference you will see the amber button with the words “Import xx words”. There is no need to import all the translations. Only import the words for the “translation_EN” and your chosen language - Manage Translation (nn)
Click this button to translate a new language or modify the translation to suit your specific needs - commit new translations
Any changed made to the translation needs to be written to the actual language file. To commit these changes and use them on your website, click the commit button - Delete This Translation
This will remove the translated database from your hosting account.
Create new Language
From the dropdown list select the new language you want to create and click “Create Now”. Because of the need to specify the language you going to use on your website in every page, you can not have two translations of the same language.
Once the database is created you will be able to click the “Manage translation” button to translate the words.
Once you are done with your translation please let us know so that we can add the translation to our central database and allow other users to “Import” a new translation. Currently this functionality is disabled.
The next article will discuss how to make the actual translations or modifications to the language file.