
XMS Systems Facebook Integration
Configuring your XMS Systems Facebook Integration module. This would give you access to the "One Click" button to share your articles, blogs, products and tours to facebook business page and Sync your facebook albums with your website.
A new and improved Facebook Integration method has been developed for XMS Systems and support the following.
- Easily post new articles to your Facebook Fan Page with the click of a button.
- Easily integrate your Facebook Fan Page photo albums in your articles and tours.
- If you are using the XMS E-Commerce Module you can post your stock items to your Facebook Fan Page
- If you are using the XMS Realty Module you can post your properties to your Facebook Fan Page
If you don't have a Facebook Fan Page but rather a Facebook Group, you can post your articles to your group as yourself with the click of a button.(this under redevelopment 5/2016)- Sync and Import Facebook Albums into the Gallery Module and modules where you can link a facebook album
Follow this tutorial for creating a Facebook Application for Integration with website
Configuring the XMS Facebook Module
Navigate to Admin » Dashboard » Website Configuration » Social Networking » Facebook Integration
We will assist you with this. The important bid for your would be to take note of the “Authors can Update Facebook Wall”. If you have members posting articles and you have this enabled they would be able to post to Facebook if you approve the articles by default.
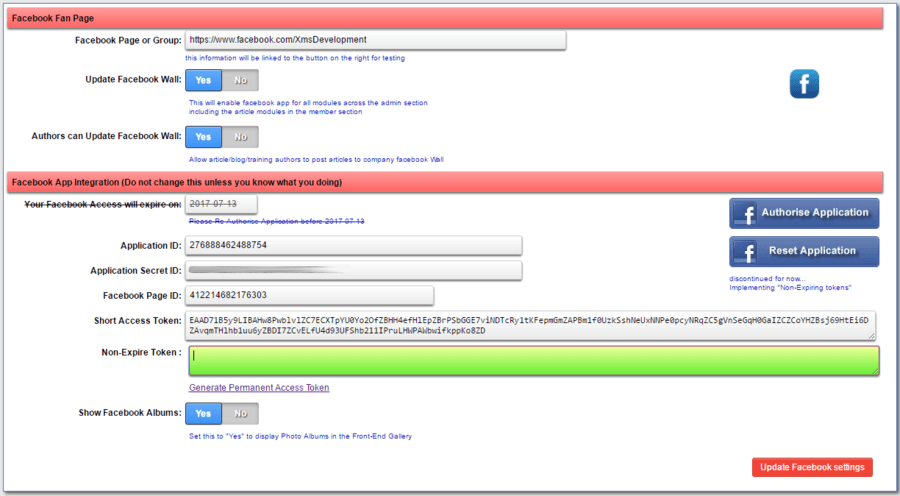
The “UpdateFacebook Wall” button will enable or disable the facebook app globally in the website.
The “Authors can update Facebook Wall” will allow your members to post to your website facebook wall the moment they publish an article.
Facebook App Integration.
Like XMS Systems, Facebook constantly upgrade their own software and things can change significantly over time. When we initially started with the integration Facebook was using version 1.xx. The latest version id V2.8 and we have updated out program to work with this version. So with a bit of luck it should stay unchanged for the foreseeable future.
The following is superceded and will be removed / updated with the next version of XMS Systems
- “Your Facebook Access will expire on”
- Authorise Application button
- Reset Application Button
Application information and access tokens
You should have access to your Facebook application you created or XMS Systems should have given you access to the application if they created it on your behalf.
Log into your facebook application and copy the following information.
Note: The API version would as it was at the time of creation or lowest version available if your app was created longer ago.
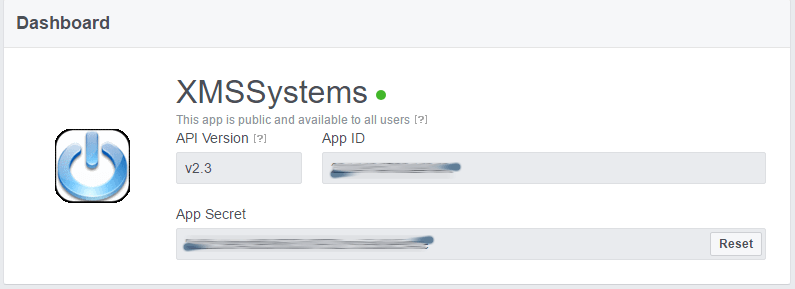
- Copy and paste the “App ID” into the “Application ID” field in your page
- Click “Show” next to your “App Secret” to reveal your Facebook Application secret code. You will need to supply your Facebook password to get access. Under no circumstance should you click the “Reset” button.
- Now copy the “App Secret” and paste it into “Application Secret ID” field on your page.
- To find your “Facebook Page ID” navigate to your company Facebook page, on the left click on “About”. Currently you will find your “Page ID” down the bottom of the page.
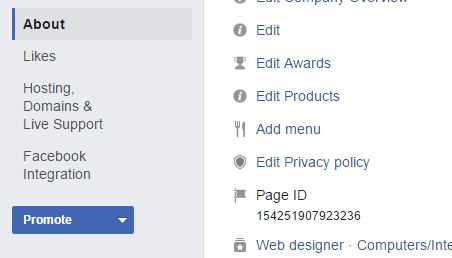
- Copy your “Page ID” and paste it into the “Facebook Page ID” field on your page.
Generating the “new” non-expiration token.
Next up, you’re going to need to get working on the access tokens.
- Firstly, visit the Facebook Graph API Explorer page. You’ll see an ‘Application’ button in the top right as show below:
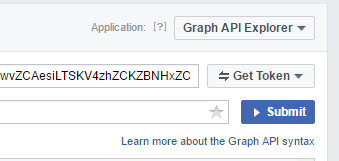
- Select your Facebook App.
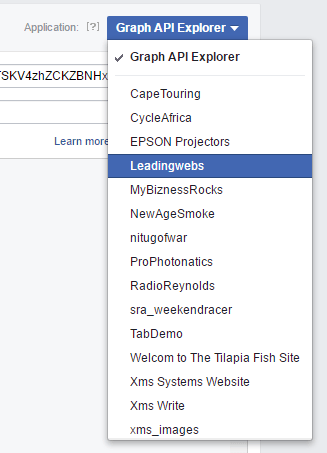
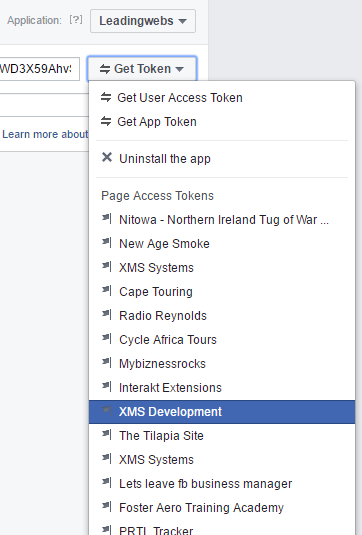
- Now click the ‘get token’ button
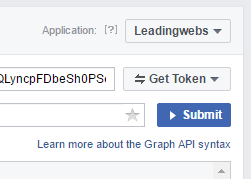
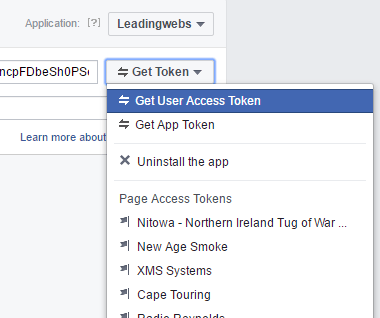
- . Select ‘Get User Access Token’
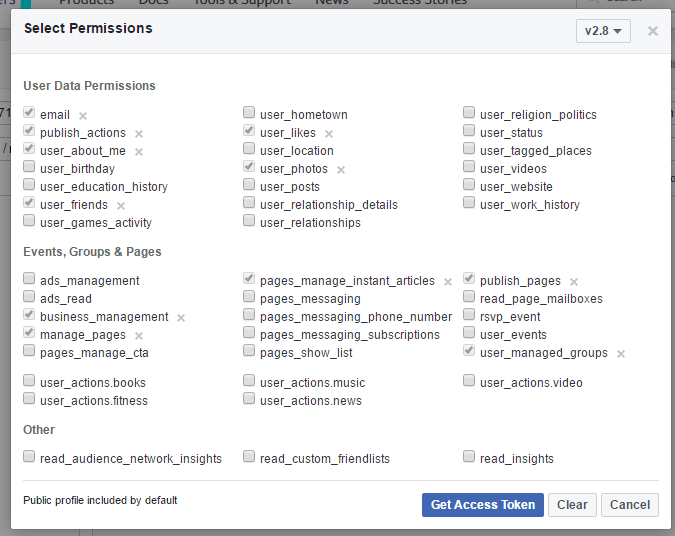
- make sure the ‘publish_pages’ and ‘manage_pages’ permissions are ticked
- click the ‘Get Access Token’ button.
- Now click the ‘get token’ button again and select your Facebook page.
- Confirm your your Access Token is working, click the “blue” icon to the left of the token. You will see this is a “short” access token and it will expire in about an hour.
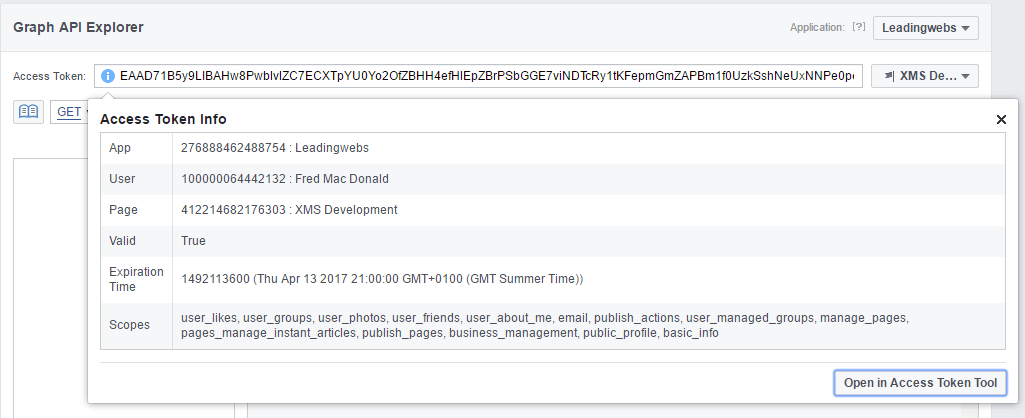
Convert short live Facebook Graph API access token to a “non-expiery” Facebook Graph access token.
- Copy the token above and paste into the “Short Access Token” field in your XMS Systems Facebook integration page and click update.
- The page will reload, scroll down and click the “Generate Permanent Access Token” link to generate the non-expiry token.
- Copy the returned token and paste it into your page and click the update button.
You are ready to go…
Since this is theoretically a once-of process we decided to not automate this functionality. We can use the time to improve XMS Systems where it matters.
For the readers that want to know where the link to generate the non-expiry token points to. Here it is,just replace the bold bits with your own information.
https://graph.facebook.com/oauth/access_token?grant_type=fb_exchange_token&client_id={app_id}&client_secret={app_secret}&fb_exchange_token={short_live_token}
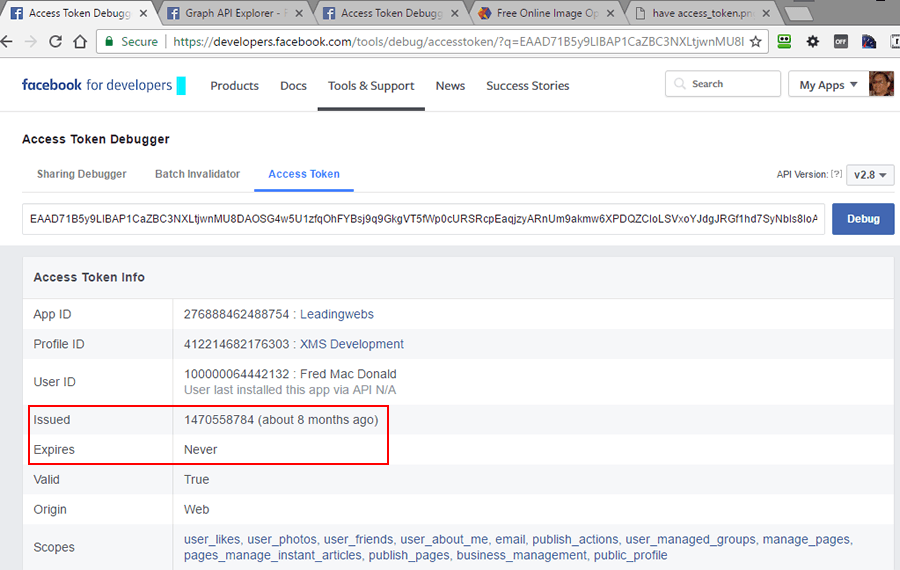
How do I know if my new token is a non-expiry graph api token?
Visit the Facebook Graph Access Token Debugger page. Paste your non-expiry token into the field and click debug.
The return should be something like this.
The images below is pulled in from our Facebook Page – General Album
